Friday, December 17, 2010

Printer Help and Support

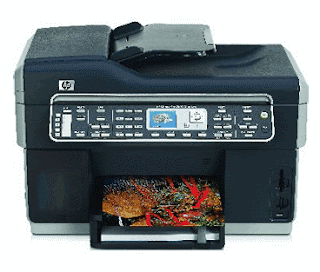
HP (Hewlett-Packard) is one of the largest company which manufacturing Printers, personal computing device, enterprise servers, related storage devices as well as other imaging products. Printer gives your hard copy print out in test of graphic format. In 1976 the inkjet printer was invent, but very often consumers can able to survive that one. In 1988 hewlett-Parkard's release of the DeskJet inkjet printer, which was very affordable to mostly consumer.

There are some type of printer which manufactured by HP :

    * Color inkjet all in one printer
    * laser jet printer
    * Color laser jet printer
    * Photosmart printer

If you are planning to buy a HP printer for home or business, then you should have good online hp printer support services and also some knowledge about the HP printer like:

How many pages do you print in a per day or month? If you want those printer which is gives you more printout in very less time, then you should go with the HP Laserjet printer series. HP Laserjet printer can able to printing fast. Because it has it's own processor, Memory (Printer RAM) and lots of page holding facility. It is available in market that its specification. Which printer gives you more page in per minute, you can choose that one.  

How often do you print in color? It is very important question because color printer ink cartridge is very expensive to buy rather then black ink cartridge.

Do you need Photo-quality? If you are create your own marketing advertisements and you expect better photo-quality, then you should go with HP Photosmart printer. Either you use inkjet photo smart printer or laserjet photo smart printer.

How many people use your printer? If your printer use by several user continuously, then you should need a network printer. It has inbuilt network interface. You can connect it into the your network and just shard it. 

There are some basic HP Printer troubleshooting tips for each Hp Laserjet printer model which help you lot. If your printer getting error code like:

Error code 02: It is related to printer Warm up issues. If you are facing this check about your I/O cable for loose connection.

Error code 11: It is simple Out of paper issue. You should need to insert the more paper in printer paper tray.

Error code 14: It you are getting this error message then you should check about Absence of toner cartridge.

Error code 22: It means some printer Configuration settings is incorrect.

Error code 30: It shows Postscript firmware problem.

Error code 40: usually means that there is a disconnection between data transferring for computer to printer.

Tuesday, November 23, 2010

HP Printer Error Code 41 & 41X

ERROR 41
  • Momentary error, press "Continue" or "GO" to reset the printer
  • 5L/6L Power Cycle the printer if error continues reseat the DC controller to Formatter
  • 5P/6P Occurs if printer picks up two sheets of paper at once. Check pickup rollers and separation pad clean as needed. Replace if problem persists
  • IIIP/IIP/IIP+ Paper feed problem - check feed/pickup rollers for movement and wear. Replace as needed
  • IIP S/N between 2925J00000 and 3047J99999 replace fuser assembly
ERROR 41-X
    X= 1,2,4,5 A temporary error occured - Press "CONTINUE" to clear. 41.3 Error - Unexpected paper size - more than one sheet of paper picked up. May be feed problem. The media that is loaded does not match the settings of the paper tray. Can also indicate a mis feed or paper not being picked up.


For More Detail


HP Printer Error Code 57

Monday, November 22, 2010

HP Printer Error Code 22

Error 22 Error/ I/O Config Error/ Par I/O Error/MIO Error
  • 22 EIO X BUFFER OVERFLOW The EIO card in slot X has overflowed it's buffer and data loss will occur
  • 22 EIO X BUFFER OVERFLOW - The printer parallel buffer has overflowed during a busy state.
  • I/O configuration for the computer or printer is incorrect. Configure is properly.
  • Check I/O Cable, it could be the wrong cable or damaged.
  • To much data sent to the I/O port - clear data with GO or Continue, data may be lost
  • Is the computer on?!
  • How about the I/O port - damaged, seated properly, pins not bent?
  • 4+/5P/5 The computer and printer aren't talking because of improper signal protocols. Could be a bad cable or loose connection or just a poor quality cable. Reseat the cable and use only high quality IEEE 1284 compliant cables.
  • 5Si Are you using a non-HP MIO device?


For More Detail
Hp Printer Error Code 13
Hp Printer Error Code 16
Hp Printer Error Code 20

Wednesday, November 17, 2010

HP Printer Error Code 16

Error 16 Toner Low

  1. Toner cartridge is empty or toner in cartridge is not distributed evenly. Gently shake the toner cartridge both from side to side and from front to back. This can generally get you 100 or so more pages.
  2. Bad or dirty cartridge contacts. Look for the conductive contacts on the cartridge and the corresponding contacts in the printer and make sure they are clean and free of contaminants.
  3. Defective High Voltage power supply or on the LJ II/III the DC controller to High Voltage power supply can be defective. Check for opens on the cable.
  4. IIISi/4Si check the door open sensor flag, PS1. Also check the toner level sensor and the toner cartridge itself for damage. It can also be caused by a defective DC controller. You can verify this by substituting a known good DC controller if possible.

    For More Detail

    Monday, November 8, 2010

    HP Printer Error Code 12

    Error 12 Printer Open

    1. Paper path door (IIP/IIIP) or top cover open. On the IIP/IIIP this can be caused by a defective toner cartridge, defective cooling fan, PS4 or PS5 sensors. Also caused by the density adjusting PCA located behind the density adjusting slide switch. This board takes the input from the two sensors and provides info to the DC controller. If the board becomes defective, you will receive an error 12. Easily replaced after removing the top cover and three wiring harness connectors. If you want to attempt board level repair try the electrolytic capacitor, C702, 10 uF 50 VDC. On the 4P/5P printers, the top cover is open or no toner cartridge is installed. This error can also be caused by a defective interlock switch assembly.


    2. On the Laserjet 4/4+ an error 12 can indicate the top cover open or a broken tab on the cover assembly. On rare occasions a defective paper control assembly or actuator can cause this problem. Verify the tab on the cover is not broken.

    For More Detail
    HP Printer Error Code 10

    Thursday, November 4, 2010

    Printing Pages with Blue Background

    We have some pages that users may have a problem printing. These are the pages with white and yellow text on a blue background.

    They can be printed by changing the color options in the browser.

    In Netscape Navigator 4.0:

    * From the Edit menu, select Preferences
    * Under the Appear category, select Colors
    * Select the option:
          Always use my colors, overriding document
    * The page will now have dark text on a white background, and you will be able to print it.
    * When finishing printing, you may want to uncheck that option to return to the pages with the blue background.

    In Netscape Navigator 3.0:

    * From the Option menu, select General Preferences
    * Select the Colors tab
    * Select the option at the bottom:
          Always Use My Colors, Overriding Document
    * The page will now have dark text on a white background

    In Microsoft Internet Explorer 4.0:

    * No changes are needed; these pages print properly with black text

    All our other pages, with dark text on a white background, should print properly without changing the color options.


    Source:- mentalhealth.com

    Wednesday, November 3, 2010

    Windows 3.x Printer Troubleshooting

    Issue:

    Windows 3.x printer troubleshooting.

    Cause:

    It may be required to do basic troubleshooting in Windows 3.x to get your printer to work properly.

    Solution:

    Windows 3.0 Users -Unfortunately, Windows 3.0 had several printing limitations and it is recommend that you upgrade to at least Windows 3.1.
    Windows 3.1 and 3.11 - Incorrect or out of date video drivers may cause issues with printing in Windows 3.1 and Windows 3.11. Attempt to change your video card to "Standard VGA" by going to MS-DOS prompt and type cd\windows and then type setup; this can also be done through Windows.
    If this resolves your issue, update your video card drivers.
    If this does not work, attempt to reinstall the printer.


    Source:- computerhope.com

    Friday, October 22, 2010

    How to Fix a Lexmark Printer


    If your Lexmark inkjet or laser printer is printing erratically, printing incorrect colors or not functioning at all, you don't need to return the unit or find a service center for a repair immediately. There are a series of simple troubleshooting steps you can follow at home to fix the printer on your own

    1. Check to make sure the printer's AC adapter is firmly plugged into a wall outlet and its USB cable is connected to the USB port on your computer. Try plugging the AC adapter into a different wall outlet, in case your outlet has stopped working or try a different USB cable in the event that it has gone bad. Pop open the top cover of the printer and check to see if any paper is jammed inside and needs to be physically removed.

    2. Open the plastic cover over the ink cartridges or laser toner and pull them out. Check the orientation of the ink or toner. Replace them to make sure they are properly installed. Snap the plastic cover back into place.

    3. Read the information on the LCD screen that shows the printer's status if you have a Lexmark laser printer. Check to see if there is a specific error message being displayed and then consult your manual to see what steps can be taken to fix the problem. Take the printer to a Lexmark authorized service center or purchase your own maintenance kit and replace the print head if you see the error message "Error 80 Scheduled Maintenance" (see Resources below). Remove and then return the toner cartridge if you see the error message "Error 20." Replace the cartridge entirely if you see the error message "Error 31," which indicates a defective cartridge.

    4. Power your computer off and then back on. Attempt to print your document again in case your computer stopped recognizing your printer temporarily. Click "Start" on your task bar and then access the Control Panel. Choose the option to "Remove Programs." Uninstall the Lexmark software you installed when you first setup your printer. Locate the CD or floppy disk that came with your printer and put it in your computer. Follow the instructions on the screen to re-install the software.

    5. Access the Control Panel again. Click "Printers." Verify that your Lexmark printer is in the list of available printers. Click "Add a Printer" if your printer is not showing up. Follow the instructions to add your printer. Navigate back to the Control Panel and click "Devices." Click on the plus sign next to "Printer" and then right-click on the name of your printer. Click "Settings" and then click "Drivers." Download the new software if a more up-to-date driver is available.

    6. Open the Lexmark printer software by double-clicking on its desktop icon or navigating to it through the Start bar. Click on the option to print a test alignment page to ensure that your printer is now working properly.


    Source:- Ehow.com

    Thursday, September 30, 2010

    Tips and Tricks for Hp Printer Ink Refill Kits

    Brand new printer ink cartridges cost a considerable amount of money in general, and while printer ink cartridges from Hewlett-Packard can be said to be more affordable than most, they are still a little bit expensive. Thus, it makes sense for the average computer user to give using HP printer ink refill kits a good thought.


    Buying and using HP printer ink refill kits do translate to savings for the average computer user. However, the downside of this is that if these refill kits are used incorrectly, it can lead to irreparable damage to the printer.

    To make the task of refilling printer ink cartridges using HP printer ink refill kits easy for the average computer user, here are a few tips and tricks.

    1. Always buy an HP printer ink refill kit that is specifically manufactured for the particular model that you have. Each printer unit requires a specific formulation of ink to function properly. Feeding your HP printer with the wrong type of printer ink will permanently damage your printer.

    2. Never wait for your printer ink cartridge to go bone dry before you refill it. Always watch out for signs that the ink cartridge is running out of ink. If you wait too long, the printer ink left inside the cartridge will clog the cartridge outlets and damage it. Refilling a damaged ink cartridge will result at best in bad print quality and at worse in irreparable printer head damage.

    3. Make sure that you follow the instructions on your HP printer ink refill kit to the letter. If you do not follow the instructions carefully, you will only end up with a damaged cartridge, or worse, a damaged printer head.

    4. In filling a colored printer ink cartridge, be certain that you fill the cartridge chamber with the correct color of ink. Failing to do this will result in skewed printing results.

    5. No one wants to get messed up while refilling an ink cartridge with a refill kit, so always line your workplace with cloth before you begin. Cloth will absorb the ink and keep it from seeping onto the surface of your workplace.

    6. Got ink on your hands while refilling your printer ink cartridge? Do not worry about it. To remove ink stains from your hands, just wash it first with soap and water to get the excess oil of the ink off your skin. Follow it with a wash of mild bleach mixed with water. And then, wash your hands again with soap and water to get the bleach off.

    Using HP printer ink refill kits are very handy and can result in considerable savings. But here is a caveat for you, though: If your printer is still under warranty, you will lose your warranty in case it is damaged by printer ink from the refill kit. Also, you can only refill an HP printer ink cartridge once or twice because the risk of ruining the printer gets too high.


    Read more: articlesbase.com

    Monday, September 27, 2010

    USB Printers Troubleshooting Tips and Tricks

    1. Ensure that the virtual machine is powered on.
    2. From Fusion's menu bar, click Virtual Machine > Settings.
    3. Click USB Devices and ensure that the problematic printer is selected in the Connect USB devices field.
    4. Click Show All and click Printers.
    5. Deselect Enabled.
    6. Close the settings pane.
    7. Shut down the virtual machine by going to Virtual Machine > Shut Down or Virtual Machine > Shut Down Guest .
    8. Click Start, right-click on My Computer and select Manage.
    9. In the window that appears, click Devices Manager and expand the Universal Serial Bus controllers menu.
    10. Check for your printer or unknown devices in the Device Manager list.

    1. If you do not see your printer or any other unknown devices, manually reinstall VMware Tools. (For more information, see Uninstalling and manually installing VMware Tools in VMware Fusion (1014522) .)
    2. When VMware Tools is reinstalled and the virtual machine has restarted, repeat steps 2 - 3.
    3. If your printer is in the device list, click Start > Control Panel.
    4. If the Printer is in the list but has an offline status:

    1. Right-click on the printer and deselect Use Offline.
    2. Try to print.
    3. If your printer still does not work, reinstall your printer software and repeat step 9b. You may download the printer software from the manufacturer's website. If you need assistance installing your software, see Working with printers, disks, and other devices.

    5. If an unknown device is in the device list, reinstall your printer drivers and software. You may download the printer software from the manufacturer's website, If you need assistance installing your software using an install disk.

    11. If the issue persists, manually uninstall and reinstall VMware Fusion.


    Source:-kb.vmware.com

    Tuesday, September 21, 2010

    How to Fix Common Brother Printer Error Codes

    Have you ever encountered a printer error code while using your Brother multifunction printer? Chances are that you have. It is not that the Brother multifunction printer is an inferior machine; in fact, it is one of the best multifunction printers out there. But just like any machine, it can bog down. And when it does, a printer error code might pop up on your computer screen or on the LCD control panel of the printer.

    What are the common printer error codes of Brother multifunction printers and how can we fix them?

    Here is a list of these common printer error codes.

    Error Code S05. A printer error code like this happens when the transfer of data via the parallel port is not going smoothly. Just reset your printer to get it going again.

    Error Code E50. This printer error code flashes when the fuser unit of your Brother multifunction printer gets damaged. When this happens, it is a signal that you must replace your printer’s fuser unit.

    Error Code E51. When the printer’s laser beam, lid or mirrors are not placed in their appropriate positions, it results in this printer error code. Please check if ink cartridges and everything in your printer is where it should be before you start using it again.

    Black pages. Sometimes, the message “Black pages” can flash on the screen, or a black page is actually being printed out. In this case, you would need to take your printer to a service center and replace its jumper wires and diodes.

    Check paper path. When this message shows up, it means that your Brother printer has a dirty or misaligned eject roller. Clean it or straighten it up, whichever is necessary, and then try printing again.

    Poor quality of copy. When the output of your Brother multifunction printer, be it the printout or the fax, is smudgy, it could be because the scanning mirrors or the glass is dirty. Clean them up if they are. However, if these are clean, then the problem could be your printer’s camera. You can try out unplugging your printer for a few hours, but if the problem persists, you may have to go to a service center to get your printer’s camera replaced.


    Source:-  articlesbase.com

    Saturday, September 18, 2010

    Error: " 200 Paper Jam - Remove Cartridge"

    If there is no paper jammed in the printer and you still receive this error every time you turn the printer on, there could be something blocking the sensor. A close examination of the paper path, especially at the front of the printer, might reveal a piece of paper, a broken printer part, etc.
    To remove the jammed sheet of paper :
    Open the upper front door.
    Grasping the print cartridge by the hand grip, pull it towards you and slightly up to lift it out of the holder.
    Then pull the cartridge straight out towards you. (See picture below.)
    Locate the feed roller release lever and gently push it back to release the pressure on the paper. (See picture below.)
    Pull the paper out.
    CAUTION! The paper may be covered with unfused toner, which can stain garments.
    If you see no paper jammed under the cartridge, remove paper tray 1. The paper may not have fed all of the way into the printer.
    Reinstall the paper tray and the toner cartridge.
    Close the upper front door.
    If paper is getting damaged when it is jammed at the sensor or under the cartridge, you may be able to pinpoint the problem with a close look at where the leading edge was stopped.
    Check for any damage to the leading edge of the paper.
    If it is damaged, check the paper path for any obstructions.
    You can also try another toner cartridge if you have one in stock. The paper may be catching on the edge of the cartridge.
    If you are not able to find any obstruction, the printer will probably need service to isolate the problem and replace the failing component.
    If you receive this 200 Paper Jam error message on power up and there is no paper jammed in the printer, the printer's input sensor flag may be stuck.
    Look for the green bellcrank release lever at the left side of the inside of the printer, under where the cartridge goes. You will also see two white rollers and, underneath them, two white gears. Just back and to the right of the back gear, you should see a black, plastic flag sticking up through a hole in the black plastic floor of the printer. This flag is the input sensor flag. 
    Using a pen or pencil, push the flag towards the back of the printer. It should lie down. When you remove the pen or pencil, the flag should pop back up freely. 
    If it does not, see if you can find out why. There may be a piece of paper or broken printer part in the way or the flag may have come loose. 
    If the input sensor flag is damaged or missing, you will probably need service on your printer.


    Source:- laserquipt.com

    Tuesday, September 14, 2010

    How to Fix Printer error 49.4c02?

    Follow the given below Instructions to Fix Printer Error 49.4c02 


    1.  Press CANCEL JOB to clear the print job from the printer memory.  Turn the printer off and then back on.
     
    2.  Try printing a job from a different software application. If the job prints, go back to the first application and try printing a different file. If the message appears only with a certain software application or print job, contact the software vendor for assistance.
     
    3. If the message persists with different software applications and print jobs, disconnect all cables to the printer that connect it to the network or PC. Turn the printer off.
     
    4. Remove all memory DIMMs or third-party DIMMs from the printer.  Remove all EIO devices from the printer. Turn the printer on.
     
    5. If the error no longer exists, install each DIMM and EIO device one at a time, making sure to turn the printer off and back on as you install each device.  Replace a DIMM or EIO device if you determine that it causes the error.
     
    6. Remember to reconnect all cables that connect the printer to the network or computer. If the error persists, replace the firmware DIMM.  Replace the formatter and calibrate the printer.
     
    Hope these Instructions helps you to fix Printer error 49.4c02


    Source:- fixyourownprinter.com 

    Wednesday, September 8, 2010

    How to network two computers to same printer?

    While going about connecting 2 computers to one printer, you need to follow a few steps to ensure the process is smooth and hassle-free. Here we outline some of these basic steps.

    Connection: To be able to connect both computers to a single printer you need to setup printer on "client" PC:
        * Connect printer to "client" PC and install it. This way all required software and drivers are installed.
        * Reconnect to "host" PC
        * Select "Properties" by right clicking
        * Select "shared"
        * In "client" PC:
        * Select "My Network Places" or "Network Neighborhood"
        * Printer appears as "shared"
        * Double click on the printer to install it
        * The same printer is now installed twice - as local and network printer
        * If always using network printer, set it as "default"

    Set up a LAN:

        * To be able to perform a 2 pc 1 printer connection, you first need to set up a LAN or a Local Area Network. To do this, follow these instructions:
        * You could either use a network adapter in your home office OR
        * To view the status of the network connection, you need to
        * Double click on Network Connections
        * Right click on the particular LAN
        * Select Status option
        * You could also right click on the LAN, click on Properties and then select the "Show icon in taskbar notification area when connected" checkbox. This will enable you to automatically view the status in the taskbar area.

    Get a printer switch: Printer switches enable you to connect 2 computers to one printer. They come in a variety of types such as auto printer switch and parallel printer switch. There are several vendors available online who provide these switches at good discounts.

    Crossover cable: You can easily get a crossover cable from your local computer store to connect your computers to your printer. After that you can network and open the desired printer and enable it to be shared between both computers.

    Print server: A print server enables you to print simultaneously from two computers at the same time. However you need to ensure you have a router (which will act as a DHCP server). You also need to make sure that it's not a multifunctional printer you're working with since most print servers are not able to work with such kinds of printers. In case you do not have a router, you could purchase a PSUS4 print server, then assign static IP on the network cards and print server.

    No network ports present: In case there are no network ports present, then you can use either USB or parallel port adapters for your purpose.

    Thursday, September 2, 2010

    How to Override a Printer Error for a Lexmark Print Cartridge?

    Override a Printer Error for a Lexmark Print Cartridge, Try detailed & step by step solution to fix Lexmark printer cartridge error:

    Remove and replace the print cartridge. If that doesn't solve the error.
    • Try the steps listed below:
    • -->  Remove the print cartridge from the machine.
    • --> Wet the end of a cotton swab with rubbing alcohol.
    • --> Wipe the copper colored contacts on the print cartridge with the cotton swab to clean.
    • --> Wipe the contacts in the printer where the cartridge sits.
    • -->  Replace the cartridge and try a test print. If removing residue for a clean connection didn't solve the error, move on to step 7.
    • -->  Turn off the printer.
    • -->  Unplug the printer from the power source and leave it unplugged for 15 to 30 minutes. This will reset the printer.
    • -->  Plug the printer back into the power source and turn it on.
    • -->  Print a test page.

      The solution above will help you out to fix printer cartridge error with your Lexmark printer.

      Wednesday, September 1, 2010

      How to fix Lexmark X5470 printer that is displaying Error 1203?

      Cartridge Error: 1203

      Your print cartridge has a short.

      1. Press Power to turn your All-In-One off.
      2. Unplug your All-In-One from the wall outlet.
      3. Plug in your All-In-One.
      4. Reinstall the cartridges.

      Friday, August 27, 2010

      How to fix HP Printer Error 49

      HP Printer Error code 49 is shown when you try and print out a document on your system. It is normally caused by a failure in communication between your PC and your printer, making it impossible for your printer to be able to handle the work you want it to print. The issues that cause this error typically include the likes of invalid print commands, damaged data transfer, invalid operators and registry errors.

      The first step to fix this error is to "calibrate" the printer. This basically means that you use several inbuilt Windows features to not only make sure your computer recognizes the printer, but is also able to perform operations & print from it. To do this, you basically just need to turn off the printer, and then turn it back on again. After you've done that, test out the printer from another application, and if that works, you should look at what could be causing the problem in the other application you were using. If the printer doesn't work on a different application, then you should "reinstall" the printer on your system by using the "Device Manager" to remove the device and then install it again.

      This process should basically wipe your computer's current configuration for the printer, and reinstall it as a new device. It's often the case that printers will either become damaged, corrupt or unusable for some small, unknown problems on your PC. You may also wish to reinstall the drive for the device as well.

      On top of doing that, you should repair the registry of your PC. This is very important, as the registry is often cited the biggest reason why HP printer errors will show up. The problem is that the 'registry' is continually being saved incorrectly, causing many of its important files & settings to become damaged. This not only makes it very difficult for your PC to read the registry files it needs, but will also cause a variety of errors on your system, including Error Code 49.

      The registry is basically a big database for your computer, which stores all sorts of important files and settings inside. This database is continually being used to help Windows save & recall a huge number of important settings on your system, and is what all Windows PCs use to run every day. In order to fix this database, which is probably one of the reasons why the 49 error is showing, you just need to use a "registry cleaner" application - a software tool designed to scan through all the registry files on your PC and fix the ones causing problems. You can get these tools from the Internet, and will basically clean out any potentially damaged settings on your computer to make it run much faster.

      Source: ezinearticles.com

      Friday, August 20, 2010

      Fix Printer Paper Jam Problem?

      Paper jams in printers are really troubled when you are doing printing job and it occurs repetitively. You have already wasted a lot of paper and at the same time a lot of energy troubleshooting the problem but in vain. Most of us face these types of printer problems quite often. Do you want to know how to fix printer paper jam problem? To solve this printer problem, let us look into the mechanism of the paper-feed in a printer.
      Fix Paper Jam


      At first, you put a bunch of paper in the input tray or in the automatic document feeder (ADF) and adjust the paper adjusting clips on its sides. This ensures that the paper is held straight while it is fed into the printer. There are optical sensors present in the printer which senses whether there is paper in the input tray and what size it is. Accordingly, the paper-pick rollers pick up paper from the input tray and pass it across the carriage mechanism. There are another set of rollers at the back of the printer which picks the paper and ejects it or helps it to change the direction of paper movement.

      Now that we have got a brief idea about how the paper-feed mechanism works, we can now dive into the reasons of a paper jam. You can troubleshoot printer problem on your own or you can talk to a computer repair company for tech support.

      1) Usage of unsupported type of paper will make the paper sensors to work improperly.

      2) Do not use crumpled paper. The paper should be without folds and creases when putting in the paper tray. This ensures smooth paper feed by the rollers.

      3) make sure that proper voltage is fed into the AC input. Otherwise the motors making the rollers to rotate might not work in a proper way. Try to connect your printer directly to the wall-socket without a surge protector in between.

      4) Is the carriage moving freely and is your printer making noise? Try to take care of these, otherwise a paper jam is expected.

      5) Make sure that the rollers are cleaned with a damp lint free cloth to remove paper-dirt, oil from your fingers and free the rollers of already present bits of torn paper.


      6) Also make sure that the paper type and size is selected properly in the printer preferences. If the settings are not correct then a paper jam might occur.

      Source: ezinearticles.com

      Wednesday, August 18, 2010

      Printer Product with Fax Machine

      Printer is a computer peripheral device that produces a hard copy from data stored in a computer connected to it. And it is used to print anything that we want, like pictures, documents, or data.

      If we want to save money while purchasing the printer, then the best solution is to find an printer with fax. This will allow us to get everything that we need out of one machine. It will not only helps us to save money, but it will also used to save plenty of space in the home office. Saving space is a very big thing for many of us,because we may not have a big room for work. Although if we want to save money,we shouldn't forget about the quality. Because we may have to face some consequences after purchasing the cheaper printers. So better go for quality printers in the beginning itself.

      Fax machine is used to transmit the copy of written and graphical information through the telephone network. It is similarly like a photocopier, except that, the copy is transmitted to a distant machine through the telephone network. Each Fax machine has a telephone number, this may or may not be shared with a telephone. This is mostly used in business offices, because they quickly want to transmit invoices, orders and so on.

      If we want to send the fax from this printer,First we have to place the sheet into the feeder top tray. Once the paper is placed, look at the side panel there will be a dialing pad similar to the dialing pad of a telephone. Most faxes require to press 9 and a 1 before dialing the number including the area code to fax the sheet. Once the number is dialed, then there will be a button to press to begin the fax. It may be either a enter button, go button or start button. Because each model is different.

      If there is any problem in these kind of printers, then the best thing to do first is to turn the printer off, wait for 30 seconds, and then turn it back. Another common malfunction is that ,the printer cartridge is empty or needs to be reset. So open the printer, remove the cartridge and then replace back into its proper setting and close the clamp to hold , and re close the printer. So once the problem is fixed, printer will ask us to ,print a test sheet and select the proper settings.

      This printers are continuing to appear on the market today like many other products. While it fits with your particular needs, you can feel and accept it, to be an essential part of our home or for business. if you are looking to save money, space, and energy in your home or office, consider purchasing an Printer with fax.

      Source: articlesbase.com

      Thursday, August 12, 2010

      Federal Government Aims to Save Printer Costs


      Ever wonder where your tax dollars are going? Apparently the government feels like too many of them are going toward printers, and it plans to trim the fat. According to an article in the Federal Times, government printers are currently “wasting more than $300 million a year in taxpayer dollars.” The General Services Administration (GSA) and the Office of Management and Budget (OMB) are in charge of cutting costs through strategic sourcing, and they will focus on several important points.


      First off, a lot of federal employees have personal printers on their desks. The GSA and OMB hope to eliminate many of those machines and get more workers connected to a single network printer. In addition, while the analysis of printer costs has traditionally centered around the price of the printer, the focus will now shift toward the recurring costs of consumables and maintenance. Other areas of emphasis will include getting agencies to work together to negotiate more affordable sales and services contracts with vendors, “printing on both sides, printing in black and white or in draft mode, and using fonts that save paper.”


      So why did it take so long for the federal government to figure all this out? My guess is that it’s exactly what you’d expect. The government is a bureaucracy, and change can come slowly. Plus, with a consistent flow of tax revenue at their disposal, federal agencies may not feel the urgency to shop for compatible ink cartridges like individuals and private businesses who have to worry more about profits and the bottom line. Whatever the reality is, let’s hope the government starts spending our tax dollars more sensibly, while applying the printing lessons its constituents learned a long time ago.


      Read More: cartridgenews.com

      Tuesday, August 10, 2010

      How to Fix Error 3 on Canon Pixma MP160


      The Canon Pixma MP160 is a multifunctional inkjet printer manufactured by Canon. The printer gives users the ability to print high quality documents, scan, copy and fax. 

      Fix Error 3 on Canon Pixma MP160
      Canon Pixma MP160
      Error 3 will display on the LED screen as "E3" or "Error 3," this printer error results when the printer malfunctions. Clearing the error code only takes a few steps and clears the memory of the printer to restore it to its normal state. Canon suggests clearing the code before contacting professional service repair.

      Instructions to fix an Error 3 on a Canon Pixma MP160

      Step 1 - Ensure the Pixma MP160 is turned on by pressing the "On/Off" button, you will notice the display prompt you for E3 (error 3).

      Step 2 - Press and hold the "On/Off" button for one second. The display will now go blank and begin resetting the malfunction.

      Step 3 - Wait 10 to 15 seconds and restore power to the unit by pressing the "On/Off" button once more.

      Step 4 - Allow the unit to complete its cycling process and the error code should be gone. If the code persists, your printer will need professional maintenance.


      Read more: eHow.co.uk

      Friday, August 6, 2010

      How to Clean a Canon S900 Printer


      Your Canon S900 is a great printer, but if you don't use it often, you'll notice the quality of your printed pages getting worse. You can manually clean the inside of your printer yourself.


      How to Clean a Canon S900 Printer

      To assist you with the cleaning, the Canon S900 printer has a self-cleaning function for deep cleaning the print head. Additionally, when you notice that the paper is not feeding properly, is slipping or doesn't feed at all, you will also need to clean the paper feed rollers. This procedure is also automated on the S900 model.

      Steps to Clean Canon S900 Printer:

      Clean the Inside of the Printer

      Step 1 - Turn your printer off. Open the paper output tray and the top cover.

      Step 2 - Wipe off any ink present on and around the ribs with a cotton swab. You can wipe it with dry a cotton swab, or dip the swab in isopropyl alcohol or in an ammonia-based window cleaner.

      Step 3 - Wipe the base of the ribs, making sure that the area is also clean.

      Deep Clean the Print Head

      Step 1 - Turn on your printer.

      Step 2 - Go to your computer and open the "Printer Setup" window. Click the "Start" button on the bottom-left corner of the screen, then select "Control Panel," "Printers and Other Hardware," and then "Printers and Faxes."

      Step 3 - Right-click the icon for "Canon S900," and then click the "Properties" menu.

      Step 4 - Click the "Maintenance tab," select the "Deep Cleaning" button, and then click "OK." The printer will then automatically clean the print head.

      Clean the Paper Feed Rollers

      Step 1 - Take any sheets of paper out of the paper feeder. Press the "On" button on your printer.

      Step 2 - Press the "Resume/Cancel button," and hold it down for a few seconds. After the power light flashes three times, release the button. The printer will automatically clean the paper feed rollers. This procedure will last about 40 seconds. Repeat this step at least two more times.

      Step 3 - Test if the printer is clean. Place a sheet of plain white paper in the paper tray. Press the "Resume/Cancel" button and hold it down for a few seconds. After the power light flashes three times, release the button. If the sheet of paper is fed through and comes out the other side, the printer is clean. Repeat the procedure in this step at least two more times.

      Read more: eHow.com

      Wednesday, August 4, 2010

      Tech Support for Printer Error Code

      Each time you encounter problem in your printer functionality, it displays some error message like "Error 11" or ‘Error 12". What does that actually mean? How to get them go away? Online technical support companies help users understand the message codes to find ways for troubleshooting them.


      Printer Errors
      Some common printer errors are paper jam issues, cartridge problem, power cable issues, blank paper rolling out, spooler service issues and drive failure. As stated by tech support service providers, majority of printer problems are related with configuration and installation error and special effects error. Chances of mechanical errors are rare. Now, learning about printer error codes allows users to know how to troubleshoot the software issues. First thing, tech support technicians suggest, don't panic if you see these codes are appearing on your computer screen. They are actually the indicators of the solution. The printer error codes vary with the product brands and type of the device your own.

      Error 02 is the most common error message that often appears after a span of access. This message indicates your printer is warming up. Tech support professionals or specialized printer support technicians suggest users to turn off the printer immediately and keep the device unplugged at least till it comes back to room temperature.  


      Error 12 tells your printer case is open. That means you need to check the printer ink or toner cartridge. Also you must check if the printer is really opened. 

      Error 11 signifies your printer is out of paper. Sometimes this error message also appears if the paper tray is not placed properly. All the above mentioned error messages come for HP printers. If you have Lexmark or some other brand, the message code will differ. The paper jam issue may be indicated with Error 22 instead of 11.

      Online printer support or computer support professionals help users understand the printer error codes and direct troubleshooting ways accordingly. So, now you have come to know that the printer error messages should not always be considered as signal from immediate replacement of the ink cartridge but that could be something else. Sometimes, online technical support companies provide with a list of printer error codes and their significance to help you fix the issues on your own.

      If your computer is failing to detect the printer device, you may get an error message like "Printer not found". According to tech support specialists, this happens mostly due to two possible reasons. There could be a problem in your operating system or there may be compatibility issue related to hardware or software. Tech support professionals help users to cross-verify the USB cable that has been used to connect the printer device to the computer. If there is no error in hardware settings, you need to think of the software driver. You may need to reinstall the software either from manufacturer's website or from the setup disk. Now you must have understood that most of the printer issues can be addressed easily without involving a technician.


      Read more: Articlesbase.com

      Monday, August 2, 2010

      Fix Printer Error 5100 in a Canon I860

      The Cannon i860 bubble jet printer displays error codes to alert the user when there is a problem. Error code 5100 indicates that the waste ink absorber has reached maximum capacity.


      Fix Printer Error 5100 in a Canon I860
      The Canon i860 printer uses the waste ink absorber to keep ink residue off the printer heads and internal printer components. To resolve this error code, the waste ink absorber must be cleaned out and the error code message needs to be reset.

      Steps to Fix Printer Error 5100 in a Canon I860

      Step 1 - Open the top of the printer.

      Step 2 - Locate the waste ink absorber pad on the right side of the inside of the printer. Grasp the pad and pull up to remove.

      Step 3 - Clean the waste ink absorber compartment with a tissue or cloth.

      Step 4 - Take the waste ink absorber pad to a sink. Run warm water over the pad and wring it out to clean it. Wring the excess water out when done cleaning.

      Step 5 - Set the waste ink absorber pad on a dry paper towel or clean cloth to dry.

      Step 6 - When the pad is dry, place it back into it's compartment in the printer.

      Step 7 - Close the top of the printer.

      Step 8 - Press and hold the "Resume" button on the printer. Press and hold the "Power" button while holding down "Resume."

      Step 9 - Release the "Resume" button. Press "Resume" twice. The indicator light will turn amber followed by green.

      Step 10 - Release the "Power" button.

      Step 11 - Press the "Resume" button four times.

      Step 12 - Press the "Power" button. The error code is now reset.


      Read more: eHow.co.uk

      Thursday, July 29, 2010

      Fix Photoshop Printing Error

      If you are unable to print your Photoshop project, to fix this printer error this you need to reinstall the printer drivers. Many times, you will receive an error like, "/Library/Printers/EPSON/inkjetPrinter/Filter/pdftopdf.app/Contents/Windows/pdftop Fail." Of course, the printer type and file name will change, but still you will get the desired prints.

      Common Symptoms of Printer Error

      Sometime the printer will work perfectly with other applications. If you print from Word, Paint, or any other applications or documents printer just work fine for those things. The problem occurs only when you try to print from Photoshop. For get rid f this you need to update your printer drivers.

      Reinstallation of printer driver is simple and you need to follow the step by step procedure listed below:
      •    Enter the Uninstall Programs of your Windows Operating System
              a. Windows XP - Start-> Control Panel -> Add/Remove Programs
      •    Select Your Printer
      •    Uninstall Printer

      a. Windows XP - Under Change Program, select Remove
      •    Insert Driver CD
            a. If it automatically runs, follow the instructions

      b. If it does not automatically run, open the CD folder and double click setup.exe

      Reinstalling Photoshop

      Sometimes reinstalling the printer driver does not fix printer errors problem; in such a case you may need to reinstall Photoshop as your software might have become unresponsive.


      Updating Printer Drivers

      If you have reinstalled the drivers and you are still having problems, you need to check for driver updates. You can find driver updates for your printer at your printer's website.
      1. Download the appropriate driver updates.
      2. Enter Device Manager - Hold down the window button and press the Pause Break key. Then select device manager.
      3. Open up the printer by selecting the + button next to printer
      4. Right click your printer and select update drivers

      Thursday, July 15, 2010

      Fix Printer Spooler Error

      Your about to print an important document that you need for work or school and as you hit that print button, a windows error that says "Operation could not be completed. The print spooler service is not running". What to do now? Well here are a couple tricks that will fix printer problem.


      Steps to Fix Printer Spooler Error:

      Step 1:  Click on Start then click on Run. In the dialog box type services.msc and click OK, this will bring the services window up. Scroll down to print spooler, of course just turning it on wont fix it but we do want to make sure that the start up type set to automatic. double click on the Print Spooler Service and set start up type to Automatic, then click OK.

      Step 2:  Restart the machine. Then once the machine is back up reinstall the software that came with the printer. If you don't have it you can always go to the vendors website and download it.

      Step 3:   If that doesn't fix the printer spooler problem we are going to want to completely uninstall all the software for the printer and reinstall it. So click on Start then Run type Control Panel in the dialog box and click OK. Click on add remove programs and uninstall the software for the printer.
           
      Then check Under the Printer and Fax to see if it was uninstalled. If not then just delete it. Printer and Fax is in the Control Panel. Once it is completely uninstalled reinstall the software for the printer.

      Step 4:  Then check Under the Printer and Fax to see if it was uninstalled. If not then just delete it. Printer and Fax is in the Control Panel.

      Read more: eHow.com

      Wednesday, July 14, 2010

      How to Fix Printer Errors

      When you attempt to print a document or image on your PC computer, you may occasionally receive a message about Error 1068 saying that the system's print spooler could not be started. When this happens, you will need to manually restart the computer's print spooler in order to fix the printer error. The system's print spooler is used to transfer data from a computer to a printer's memory.

      Steps to Fix Printer Error 1068:

      Step 1: Log on to your PC computer with an account that has administrative privileges.

      Step 2: Open the Start menu and click on the "Control Panel" icon.

      Step 3: Open the "Administrative Tools" folder and then double-click on the "Services" icon.

      Step 4: Scroll through the list of system services until you find "Print Spooler."

      Step 5: Highlight "Print Spooler" in the list of services and click on the "Start" link on the left side of the window.

      Step 6: Restart your computer and then attempt printing a document or image again. The Error 1068 should no longer appear.


      Read more: www.ehow.com

      Share

      Twitter Delicious Facebook Digg Stumbleupon Favorites More